If you purchased an assembled bolt carrier group separately from the barrel then you should check the headspace. If you purchased a preassembled upper with the barrel and bolt carrier group installed, then the headspace should have been checked by the manufacturer. If your bolt carrier group is already assembled, you’ll need to remove the bolt from the carrier to remove the ejector.
To the remove the ejector you’ll need; a number 1 roll pin punch, a 4 oz. ballpeen hammer and the Ejector Removal Tool. If you don’t have the Ejector Removal Tool, use the back end of a punch to depress it. You should already have a gun mat on your bench to help keep small parts from rolling around.
Removing the ejector/prepping bolt carrier to check for head spacing
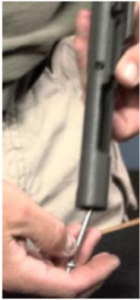
- 1. Pull the firing pin retainer pin out of the carrier and remove the firing pin.
- 2. Push the bolt to the rear of the carrier and rotate the cam pin so the long flat surface runs parallel with the carrier. Remove the cam pin and pull the bolt out of the carrier.
- 3. Place the bolt into the Ejector Removal Tool and screw in the ram to compress the ejector.
- 4. Use the number 1 roll pin punch drive out the ejector roll pin.
- 5. Unscrew the ram and remove the ejector and
- 6. Insert the bolt back into the carrier with the extractor to the right. Push the bolt all the way to
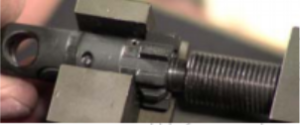
Remove ejector the rear of the carrier and rotate it so the cam pin hole on the bolt aligns with the back of the cam pin way in the carrier. spring.
- 7. Insert the cam pin so the long flat surface is parallel to the carrier. Rotate the cam pin ¼ turn.
- 8. Insert the firing pin into the rear of the carrier, through the bolt and the cam pin. The firing pin retains the cam pin.
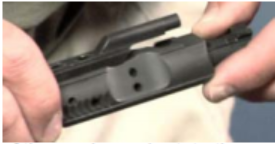
Reinstall ejectorless bolt & firing pin back into carrier - 9. Install the firing pin retainer pin from the left hand side of the carrier so it sits flush with the side of the carrier. You are now ready to start the process of checking the headspace. At the end of the checking the headspace segment we will demonstrate how to reinstall your ejector.
Checking head spacing
Now that the bolt carrier group is partially assembled, you can check the headspace of your rifle.
We will finish installing the ejector after we check the headspace. Typically, even if you mix manufacturers, these rifles will assemble well within tolerances that are safe and accurate, but we strongly recommend checking the headspace to ensure your rifle is safe to shoot. For rimless center fire cartridges like the .223 Remington and 5.56 NATO, the headspace is measured from the bolt face to a point about halfway between the start of the shoulder to the neck in the chamber called the datum line. This distance has been established by the military and SAAMI (the Sporting Arms and Ammunition Manufactures Institute) for chamber and case specifications to create uniformity and improve safety. If the headspace on a rifle is insufficient, then excessive chamber pressures can develop and possibly damage the rifle or cause injury or death. If there is excessive headspace then the unsupported portion of the case can rupture causing damage to the firearm or injury to the shooter and bystanders.
To check for excessive headspace on your rifle and finish the assembly of the bolt carrier group, you’ll need the field headspace gauge in the caliber that you’re building, Ejector Removal Tool, a number 1 roll pin holder, a number 1 and 2 roll pin punch, and a ballpeen hammer.
- 1. With the upper receiver upside down place the charging handle into the rear of the receiver and

slide carrier handle and bolt into receiver line up the cuts in the upper track that corresponds with the bulges on the charging handle. Push the handle down into this track in the upper receiver and forward about an inch.
- 2. Pull the bolt all the way forward in the carrier.
- 3. Place the carrier key into the charging handle while aligning and pushing the bolt into the receiver about half way.
- 4. Push the carrier completely forward and note how the bolt rotates and the carrier’s position when it’s in battery.
- 5. Pull the carrier group back and drop the field headspace gauge into your chamber. Push the
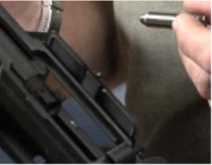
putting head spacing gauge into breach carrier forward completely. When the bolt carrier group is pushed closed, the bolt shouldn’t close completely and the carrier should not move fully forward. This simple test confirms that the tolerances of your bolt face and chamber are not excessive and your gun is safe to shoot.
Now, we can finish the assembly of the bolt carrier group by installing the ejector.
- 1.Remove the bolt carrier group from the receiver
- 2. Pull the firing pin retainer pin out of the carrier and remove the firing pin.
- 3. Push the bolt to the rear of the carrier and rotate the cam pin so the long flat surface runs parallel with the carrier.
- 4. Remove the cam pin and pull the bolt out of the carrier.
- 5. Insert the ejector spring into the bolt face followed by the ejector. The cut in the side of the ejector should be at the rear and facing the center of the bolt. Use your number 1 roll pin holder to push in the ejector and your number 1 roll pin punch as a slave pin to locate and capture it.
- 6. Keep the punch in the ejector pin hole and place the bolt into the ejector removal tool. Screw

Ejector removal tool down the ram to push in the ejector. Once the ejector is compressed you can remove the punch and start driving in the ejector roll pin with your number 1 roll pin holder. Drive the pin in as far as possible using the number 2 roll pin punch. It works better for driving new pins and prevents damage to them. Once the roll pin driven in most of the way, finish
up with the number 1 roll pin punch and make sure to drive the roll pin below the outer surface of the bolt. Check the bolt to make sure the roll pin is below the surface on both sides. - 7. Insert the bolt into the carrier with the extractor to the right. Push the bolt all the way to the rear of the carrier and rotate it so the cam pin hole on the bolt aligns with the back of the cam pin way in the carrier.
- 8. Insert the cam pin with the long side running parallel to the carrier. Rotate the cam pin ¼ turn.
- 9. Insert the firing pin into the rear of the carrier, through the bolt and cam pin. The firing pin retains the cam pin.
- 10. Install the firing pin retainer pin from the left-hand side of the carrier so it sits flush with the side of the carrier.
- 11. Before you install the bolt carrier group into the receiver, check the charging handle’s function
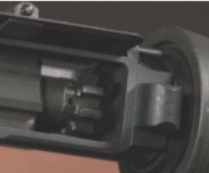
checking head spacing with reassembled bolt .
- 12. The charging handle should move freely in this path and when fully closed, lock into the latch notch on the upper receiver. The charging handle should not interfere or rub against the gas tube when it moves.
- 13. Now, pull the charging handle to the rear just about ¾ of the way
- 14. Pull the bolt all the way forward in the carrier.
- 15. Place the carrier key into the charging handle while aligning and pushing the bolt into the receiver about half way.
- 16. Push the charging handle forward until it locks into the receiver.
- 17. Push the bolt carrier forward until the bolt face rotates and locks into the locking lugs of the barrel extension.
- 18. Stick your finger into the back of the bolt carrier and pull it back and forth. Other than some slight resistance from the bolt locking and unlocking it should move back and forth easily. You shouldn’t feel any resistance from the gas tube contacting the carrier key.
Now that your upper receiver assembly is complete and has been checked, we can move onto the lower receiver.


